Sunday, May 31, 2009

Grow Bed #1

In order to start the cycling of the system, I quickly hooked up one of the grow beds. Cycling the water through the grow media lets the necessary bacteria grow for the health of the system. It is necessary to cycle the water for at least a couple of weeks before putting plants into it.


A temporary modification to keep constant water flow to the waterfall.
This connects to the grow bed output which goes directly back into the small pond.


This is the grow bed output / pond return line.
The water comes out of the pipe into a small bog area.


A weed that I had let grow in the garden and then uprooted to put into the grow bed.
This will be a test plant and a good water health indicator to let me know if it is good for growth.


The water inputs to the grow bed.
There are two so that water will enter at both ends.

Temporary Circulation

I have the pump running into one grow bed with another temporary line bypassing everything and shooting back into the pond. The grow bed is the smallest of the four so there is not much water getting filtered right now. I just wanted to get the pump running and get some circulation while I prepare the next grow bed.


Saturday, May 30, 2009

Installing a Pond Liner (Part 4)

Cut It Out!

Before I cut any of the liner I put some of the plants next to the areas in which they will be transplanted. This gave me an idea of how far I need to cut in each area. I also put down some rock and gravel to make sure the liner was fully in place in areas the didn't have a lot of water(the bog area and stream).

When cutting, it is best not to cut too much. Always error on the side of leaving extra liner. When doing the landscaping you can then cut off the excess. IMO you don't want any liner showing above the water line. An inch or so won't be bad, but cover it if you can. But for now, don't cut too much.

It's important to keep in mind that this system will fluctuate the waterline a good amount. The grow beds/bio-filters will be "Flood and Drain". That means the water leaving the ponds will not always be the same as what is entering the ponds. If by chance all of the grow beds get full at the same time there will be quite a bit of water not in the ponds. On the other hand, if all the grow beds are empty at the same time the ponds will be at their maximum capacity. These two scenarios are unlikely to happen very often, but they will happen. So when covering the liner with plants, rocks, wood, etc... make sure you extend the coverage down into the water a couple of inches.

Here is what it looks like after the "rough" cut:


Part 5 will be in a few days. The landscaping and circulatory systems will be the next posts since they are the next steps in this project. The yard has looked like hell long enough, and if I let the water sit too long it will start to do all kinds of stinky stuff.

Friday, May 29, 2009

Installing a Pond Liner (Part 3)

Filler up!

Not much to say here...hose, water, turn on.


Try as I might, I couldn't get the wrinkles out. There are too many angles and contours for it to lie flat. Besides if it is perfectly wrinkle free, it would be too tight and it would stretch.

Thursday, May 28, 2009

Installing a Pond Liner (Part 2)

Unfold and Cover

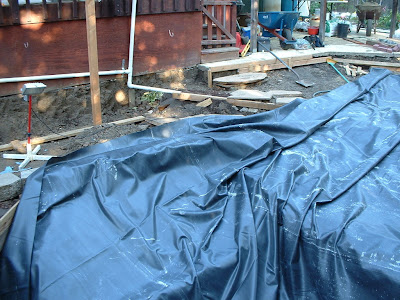
I put the liner roll in the center of the area. Unfolding was actually easier than I thought it would be. It only took about 10 minutes to fully unfold it. Once unfolded, make sure the farthest 2 points are covered. I pulled it about a foot past the north end and secured it by screwing it to a 2x4 then screwed the 2x4 onto the plywood frame, leaving the south end unattached so the liner would not get over-stretched when filling. Once the north end was secured I put screws on all the edges of the north end, making sure everything had enough liner to cover all the contours of the large pond. With the liner covering two ponds and a waterfall I wanted to make sure the large pond wasn't going to get shorted, if the liner fell short. But I shouldn't have to worry about it, as it looks like I'll have just enough to cover end to end without splicing or filling anything. The west side of the small pond has at least 8 feet of extra liner. I new this would be the case but you can only purchase rectangular pieces.I will use the extra liner for 2 of the grow beds.

Once the liner was secured I went ahead and installed the intake pipe to the pump. The glue for the pipe will need to dry before I can fill the pond. I'm gonna wait until morning so I can see things a lot better. The end of the intake will be temporarily put into an old milk crate to keep large items from being sucked in. I will cover the crate with an extra screen to keep smaller items out. Eventually I will drill holes on the pipe and cap the end. A check valve is put on the pipe to keep water from draining back into the pond if the pump is turned off. This is important to keep the pump primed with water at all times. You never want to run a pump dry. Even though the pump has 24 hour dry run protection, it's not something anyone would want to risk.


We fill tomorrow. See you then...

Installing a Pond Liner (Part 1)

For this I am going to assume you have already filled in the pool, dug out your pond, and installed the pump and plumbing.

Preparation:
Make sure all loose objects are removed. This includes dirt clumps, bits of rock and concrete, and anything that could possibly poke a hole over time. Next, you should put down sand. Put enough to cover any irregularities to make a smooth surface for the liner. Lastly, some kind of underlayment to protect the liner is highly recommended. Having dealt with a liner pool for so many years, I know this step should not be overlooked.

I used 5(6 including sand) different materials for my underlayment. All of these would have just ended up in the landfill. Most people should be able to improvise by reusing potential trash or something that is just laying around. If you don't have anything, there are many resources on the internet and locally to find what you need. So why purchase an underlayment? Don't listen to pond supply merchants, they make all kinds of claims that are over exaggerated or completely false. I read an article(somewhere on the internet) where some guy was saying that using carpet for underlayment is a health hazard to you and your neighbors. This is complete nonsense. It is geared into scaring you into purchasing underlayment. Yes, scare tactics work on all levels in this country. "W" would be proud of his technique.

Anyway, here are photos of the materials, with a list following:

1. Old carpet
2. Landscape fabric
3. Thin foam padding
4. Parts of the old pool liner that were not deteriorating
5. Large plastic bags from bagged soil amendments, potting soil, etc...(fold these a few times to make them extra thick and shove them into corners and other gaps)

Once all the above prep work has been done, double check for loose items, then soak everything lightly with water.

Now we are ready to put the liner in.

Wednesday, May 27, 2009

The Last Day of a Swimming Pool

As of tomorrow there will be no indication a swimming pool ever existed in this backyard. The liner goes in, in the morning to be filled with H2O by evening. Officially a pond, many days of enjoyment are ahead.

I have never put in a pond liner, and I am doing it solo. I have read just about every article on the net that instructs on liner installation, so hopefully all goes well. We will see in the morn.

Some last minute photos before the liner goes in:

Tuesday, May 26, 2009

Almost ready for the liner...finally!


Wanted to get an idea of what I'm going to need as far as flat-rock to make pathways around the pond so I used some that I already have to start them.
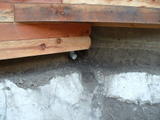

Installing the plumbing so tonight I can install the pump. Once this step is complete I will be putting the liner in...finally!

Evolution March to May

View from South end of pool/pond. First photo is from March 22. The last photo was taken May 23.


Saturday, May 23, 2009

Landscape plants in wait...

Here are many of the plants, mostly flowers, that are going around the landscape once the pond is in:


Most have less than a week to wait until they are in their new home.