Tuesday, November 24, 2009

Step-By-Step Instructions

From now on, all the future step-by-step instructions will be posted on my other blog. I created that blog for that specific purpose. It will also contain any helpful tips and information to help you get the job done correctly.

This blog will detail everything else related to the project, including what I am currently working on and other yard related topics. The link to the step-by-step's is in the sidebar or you can click HERE.

How To Make a Grow Bed (PART 2 - Mounting Support)

This instruction is for the mounting support that will go underneath the grow bed and is attached to the posts. Once the mounts are in place you just set the grow bed on top of it and secure it.


The above photo was taken when I was designing the mount and is not exactly what the final support looks like, but it does give you a good idea. An additional three posts(one 4x4 and two 2x4 posts) and a 4x4 support beam are added to the final design.

MOUNTING SUPPORT

MATERIALS NEEDED:
5 - 2" X 4" X 8' Studs
1 - 4" X 4" X 8' Post
10 - 90degree angle brackets(any type, make sure they are strong)
20 - 3" Deck Screws
50 - 1" Wood Screws or Nails

STEP 1
Cut your 2x4's at the following lengths:
2 @ 48"
3 @ 29"
2 @ 77"


STEP 2

For the full, updated instructional head over to the Step-by-Step blog HERE.

Sunday, November 22, 2009

How To Make Compost

You are going to need a lot of plants around the pond and the best way to grow them is using plenty of compost. Making good compost quickly is not as easy as a lot of people might say. If you want it fast, it takes a lot of work to get it right. It is easy if you want it next year, but if you want it in about 6 to 8 weeks, prepare to work for it.

First you need to designate an area of at least 6' by 4'. You can enclose the area with just about anything. I have used old branches jammed into the ground. Keep an opening so you can get into the area easily. You can also just make a pile without enclosing it.

I have had several compost areas in my yard over the last few years. Here are a few of them...


The key to getting it fast is to chop, shred, and cut everything as small as possible. Use a chipper, a mulcher, lawn mower, or just some hand clippers. This is the single most important part of the process. If you don't do this, you will not get fast compost.

You can use just about anything that will decompose in the pile. All food scraps, paper plates, newspaper(don't over do it), lawn/yard clippings, coffee grounds, and egg shells are just a few items I frequently put in the pile. Avoid using meat, greasy foods, and pet feces. These items will stink, attract animals, and and can cause disease.

The pile must be as large as you can make it. 4' wide by 3' high is as small as you want it. Any smaller and it won't get hot enough. The larger, the better. Size matters.

I always put new items on the top of the pile so that when I turn it, I can remove the fresh stuff before turning it. Then I place them back on the top. After it starts to decompose, it will just blend in with the pile and you should have fresher items on top by then. It just keeps feeding from the top down. This way I have a continuous pile instead of having another pile while waiting for the main pile to compost. The only problem with this method is you have to remove any items that haven't fully composted that might have got mixed into the pile.


Turn the pile every week. This can be a back breaking process and is the main reason I say that it is difficult to make compost. Some people use tumblers, but they are not even close to being big enough for my yard. Last fall My pile was about 12 feet long and 5 feet high. By January the pile had decomposed to about 5 feet long and about 3 feet high. That brings up another point, in winter, composting slows down, way down. When you turn the pile, do it in the cool of night. The process slows down late at night and it won't be so hot when you turn it.

Your pile must get hot. If it isn't hot, then you are doing something wrong. Make sure the pile is wet, but not soggy, at all times. Use green and brown items in the pile. You need a lot of dried up material, such as dried leaves, straw, or paper in the pile to provide carbon. Green items provide the nitrogen. When the pile is going good, you will know it. On a cool morning, it will be steaming if you open the pile. Like this...


Once it is done you should sift it to remove the larger objects. And for your troubles, you now have great organic, home-made compost. Your plants will thank you.


Friday, November 20, 2009

How To Make a Grow Bed (PART 1 - The Grow Bed)

This will give instructions for making a grow bed box out of wood. This does not include the mounting, underneath support, or the liner and drains. Each of these steps will have there own set of instructions. I feel this is a better way to go. A few small sets of instructions rather than one massive set of instructions is easier to follow IMO.

So here we go, the first of daily(or almost daily) instructions to cover everything this project entailed.


HOW TO MAKE A GROW BED

Materials needed:
15 - 2" x 4" x 8' fir or redwood studs
1 - 4' x 8' x 5/8" plywood

9 - 2" x 4" x 8' redwood studs(you can also use 1x4 redwood)
1lb - 1 5/8" wood screws
1lb - 2 1/2" or 3" wood screws
12 - 90degree angle brackets(any type, make sure they are strong)
4 - 24" strap ties(any type and you can get away with using only 2)
1lb - 1" nails or wood screws

Step 1
Take 2 of your studs and lay them on a flat surface. Spread them 4 feet apart and place the plywood on top of them. With the studs smaller sides contacting the floor and the plywood, line up the studs with the edges of the plywood. Secure them by screwing through the plywood into the studs every 6 inches with 1 5/8" screws.


Now measure the distance between the two mounted studs, it should be 45", but always measure for certainty. Cut 2 boards at that length using 1 of the studs. Now place the newly cut boards in between the mounted studs and secure with 1 5/8" screws by screwing through the plywood into the boards. Next, connect the mounted 2x4's at the corners with 3" screws. Image 1 below shows the details.

Now turn the plywood so it is face down with the mounted 2x4's on top. Take 8 of the angle brackets and mount them as shown in image #1 below.


Step 2
Now you are going to build the side walls up using 2x4's. You will want to take the studs and build 4 boxes. You will do as you did when mounting them to the plywood, but this time you will be adding the studs in between to form the box first. Using the exact same measurement(45") cut 8 lengths of board using 4 studs. Line up 2 of the newly cut boards between the ends of two studs and screw them together using 3" screws as in image 2A below. It is important that all these boxes are the exact same size, 4' x 8'. Don't worry if the corner angles are not exactly perfect at this point.


Once the boxes are complete take one and place it on top of the box mounted to the plywood. Take a 3" screw and, going in at an angle, mount it to the box below it. Repeat this with each box until you have an almost complete grow bed. Image 2B below shows the details.


Now take a strap tie and secure each board to the one below it on the inside of each wall using 1" screws or nails. Repeat for each side.

Step 3
Now we will make it look better and at the same time make it stronger. Take 1 of the redwood studs. Find the center of it and draw cut lines at 45 degree angles as shown in figure 3A below.


Now take 2 redwood studs and cut the ends at 45 degree angles to match up with the smaller boards, forming a rectangle. Screw them together with 3" screws as shown in image 3B below. You will first have to drill guide holes to prevent the wood from splitting. A 1/8" or a 5/32" drill bit will work. Once you have it complete, set it on top of the grow bed and secure with 3" screws as shown in image 3B below.


Now using the remainder of the redwood cut and secure trim as shown in image 3c below. You don't have to use the exact patterns I did, but make sure you have at least one center board that connects all of the wall studs. This will prevent the walls from bowing out when filled and only needs to be done on the two long walls.


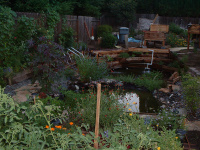
In the picture above I used a different, and stronger pattern. I was running out of wood and money at this point, so the trim is not all redwood.

That is it. Next I will show you how to make the mounting supports for the bottom of the bed once it is mounted.

Sunday, November 15, 2009

Modifying The Grow Beds

I didn't feel enough of the water flow was being filtered. This is, in part, due to needing constant water input into the upper pond to keep the waterfall flowing all the time. What I did was direct a lot of water flow directly back into the pond without being filtered. Coupled with the water being used for aeration, I would estimate only about 30% to 40% of the water coming out of the pump was being filtered at any given time.

Here is a diagram of the water flow as it was:


What I am doing to fix the problem is to modify 2 of the grow beds. I am adding a drain hole to the bottom of the bed that will be continuously draining water. The water input will be greater than the drain output, slowly filling the bed. Once the level reaches the height of the auto-siphon, it will kick in and drain the extra water. Once the water is drained the auto-siphon will stop and the cycle will repeat. I just finished the first mod, and it seems to work fine.

Anyway here is what the modification looks like:


And here is the actual modification:


Off to the next one tomorrow.

Saturday, November 14, 2009

November Images

To control mud during winter I decided it was important to finish the landscaping in the grow bed area. After a little rain, I had a taste of what the winter will be like if I didn't do something immediately. I have also spent a lot of time modifying the grow beds to get more filtration.

November images: